






























































Opening a shop is free and takes about two minutes. Follow the steps below. The pictures show exactly what you’ll see, and the pink boxes show what to click.
1. Create your shop
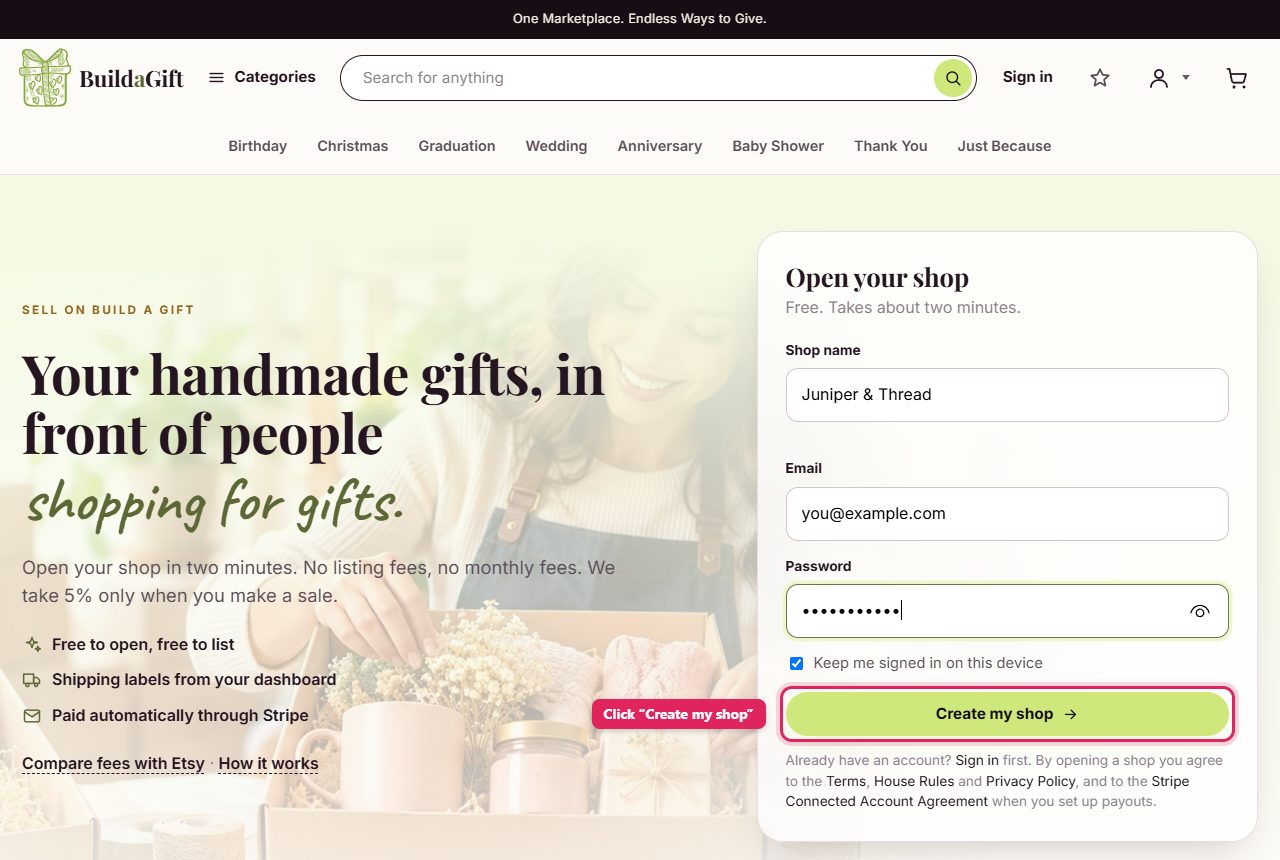
- Go to Sell on Build a Gift. You can also click Open a Shop at the bottom of any page.
- Type your shop name, your email and a password.
- Click Create my shop.
Already have an account?
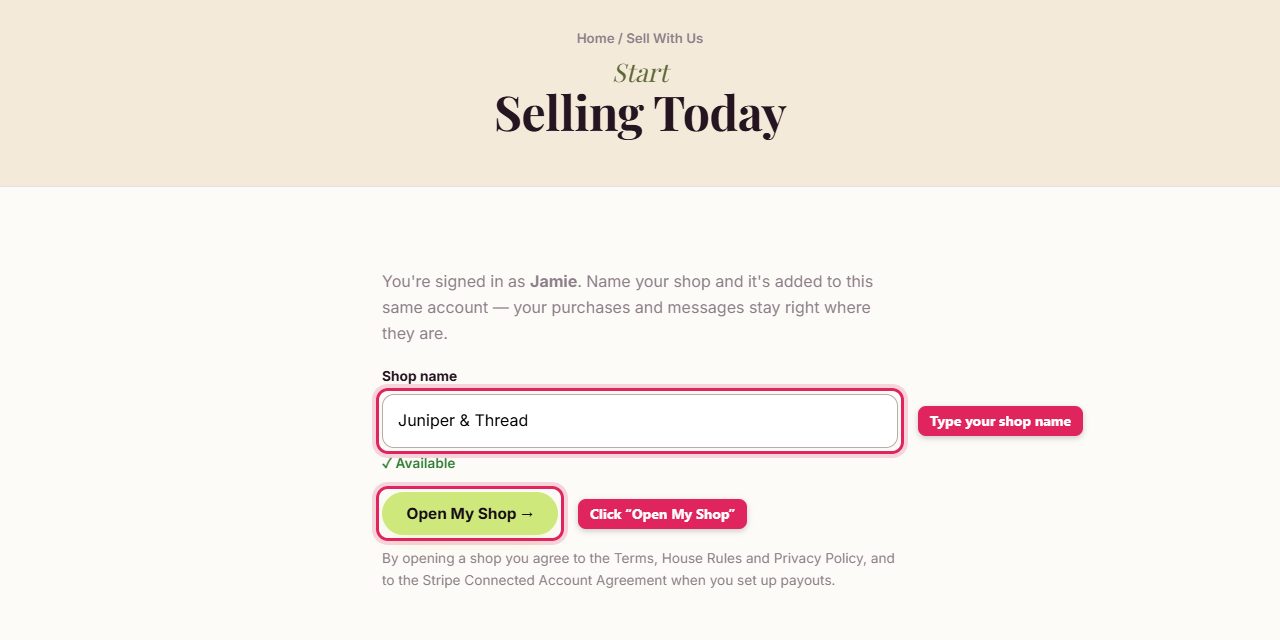
If you already shop on Build a Gift, you don’t need a new account. Your shop is added to the account you have.
- Sign in, then click Sell at the top of the page.

- Type your shop name. You’ll see ✓ Available if nobody else has it.
- Click Open My Shop. Your purchases and messages stay right where they are.
2. Your seller dashboard
Next you’ll land on your seller dashboard. This is where you run your shop. The Finish setting up your shop bar shows how far along you are, and the Shop status box lists what’s left. Click any item in that box to jump straight to it.
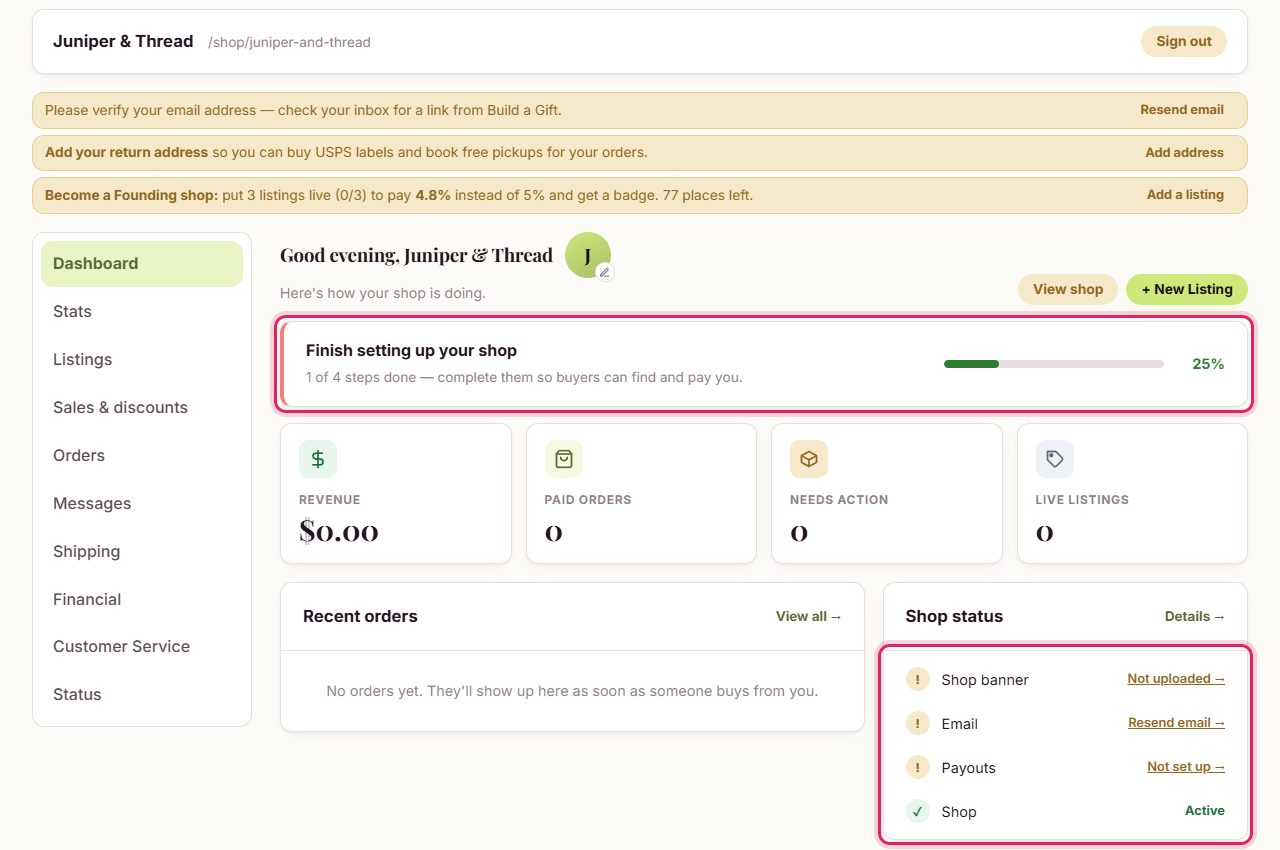
The menu on the left takes you to every part of your shop: Listings, Orders, Messages, Shipping, Financial and more. You can always come back here from My Shop at the top of the site.
3. Verify your email
We send you an email with a link. Open it and click the link to verify your address. That way order notices and messages reach you. Can’t find it? Check your spam folder, or click Resend email on your dashboard.

4. Set up payouts (to get paid)
You need this to receive money from your sales. Payments are handled safely by Stripe, and we never see your bank details.
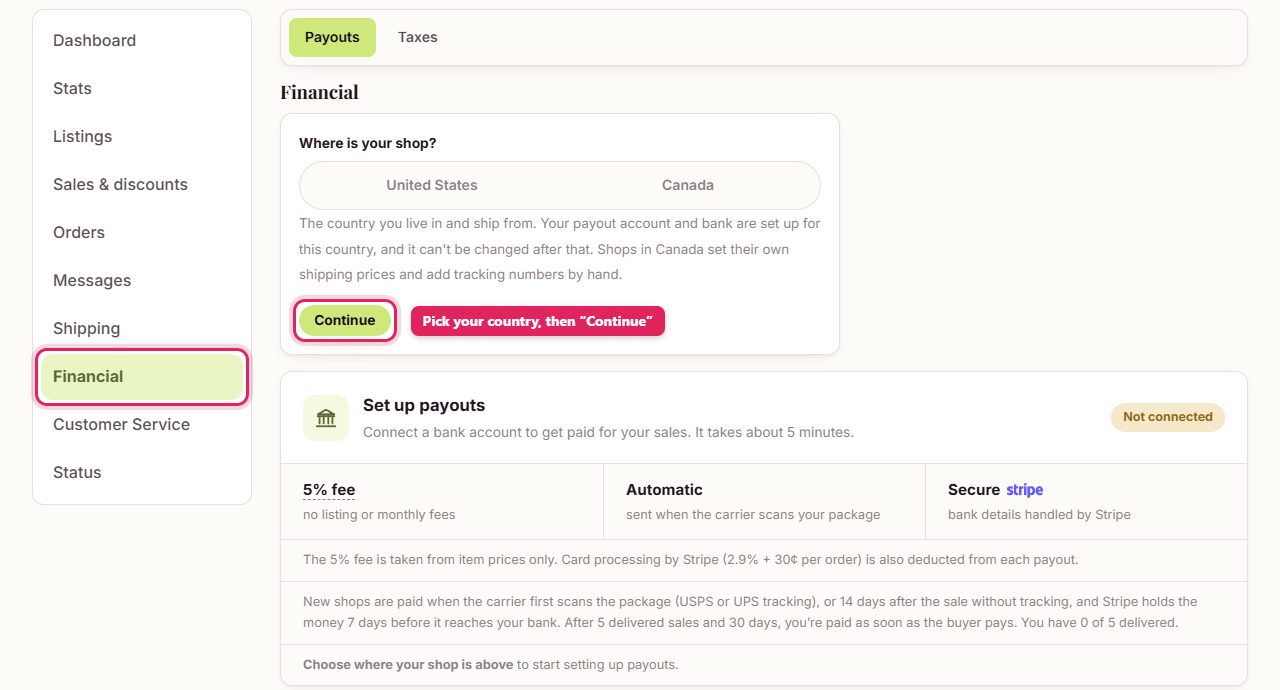
- Click Financial in the menu on the left.
- Under Where is your shop?, pick United States or Canada. Choose carefully: this can’t be changed later.
- Click Continue, then Set up payouts.
- Stripe asks for a few details about you and the bank account you want to be paid into. When you’re done, you come back to your dashboard.
5. Add your return address
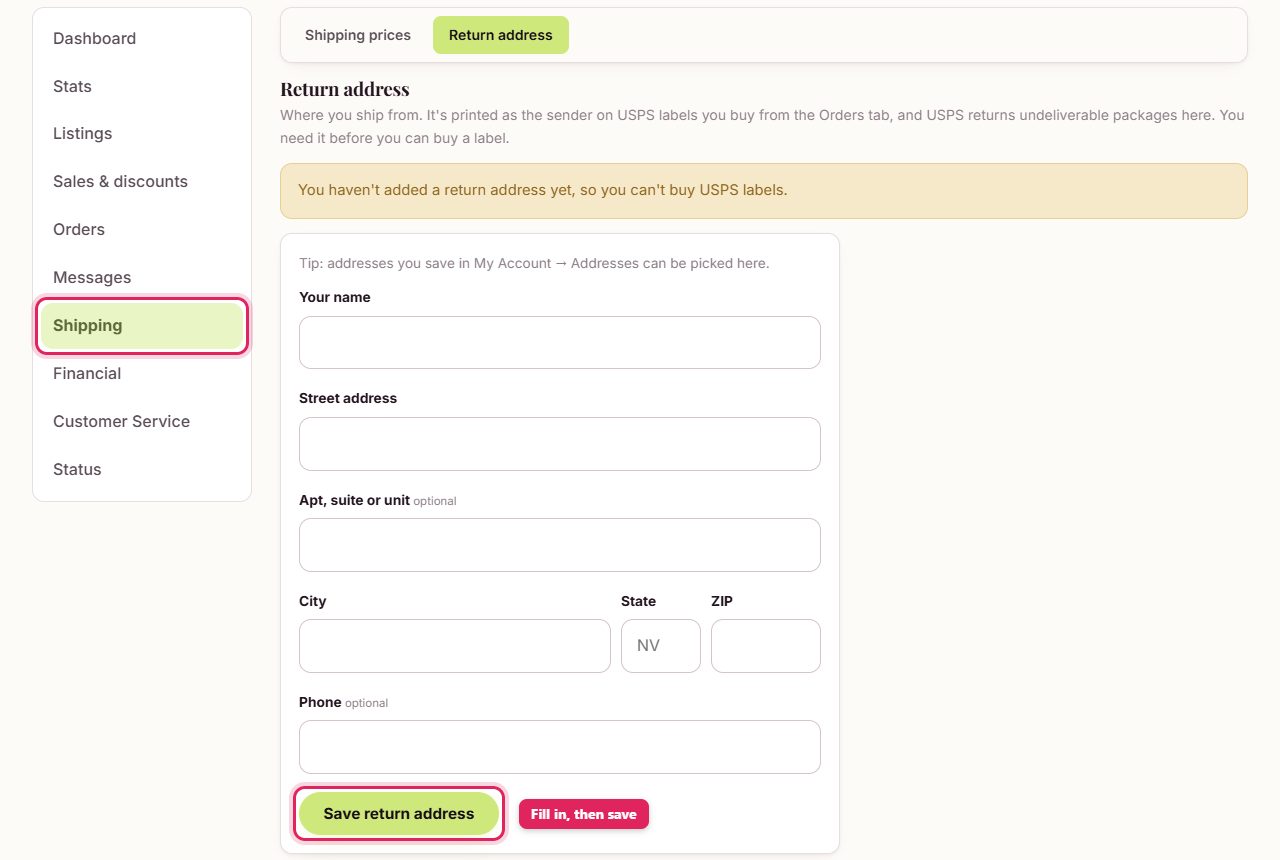
This is the address you ship from. It’s printed on the shipping labels you buy from your dashboard, so you need it before you can buy a label.
- Click Shipping in the menu, then Return address.
- Fill in your name and address.
- Click Save return address.
6. Add your first listing
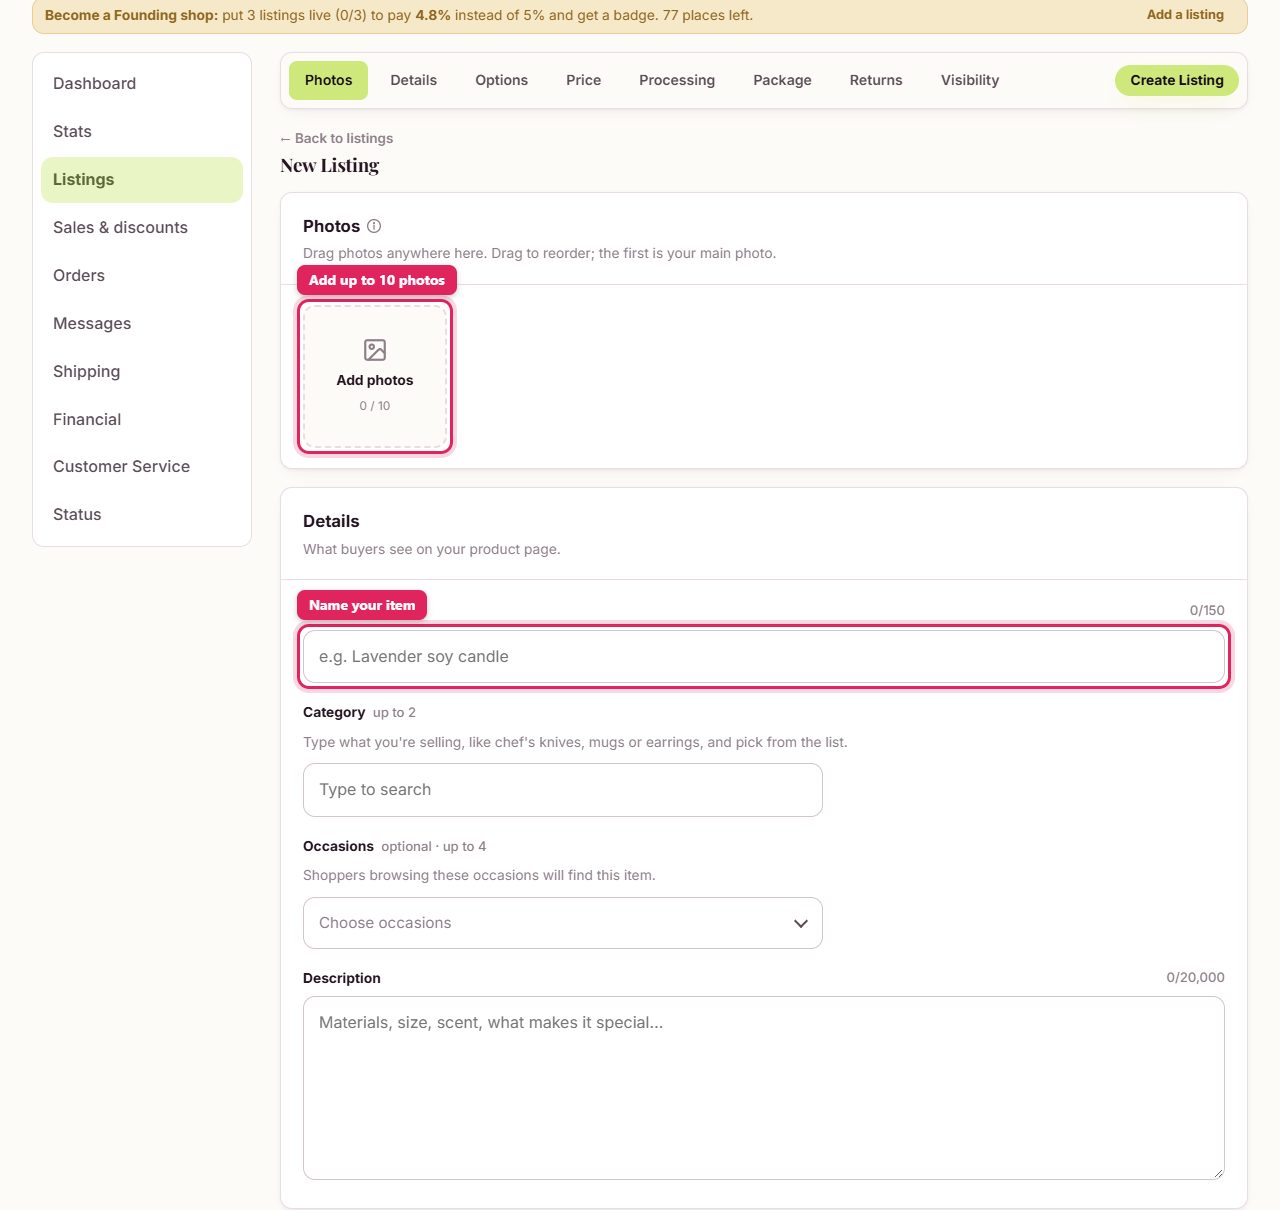
Click + New Listing on your dashboard (or go to Listings in the menu). Then fill in the form from top to bottom:
- Photos: add up to 10. The first photo is the main one buyers see. Drag photos to change the order.
- Details: the item’s name, its category, the occasions it suits and a description.
- Options (optional): sizes, colours or other choices buyers can pick.
- Price and how many you have.
- Processing: how many days you need before it ships.
- Package: the packed weight and size. These set the shipping cost, so be accurate.
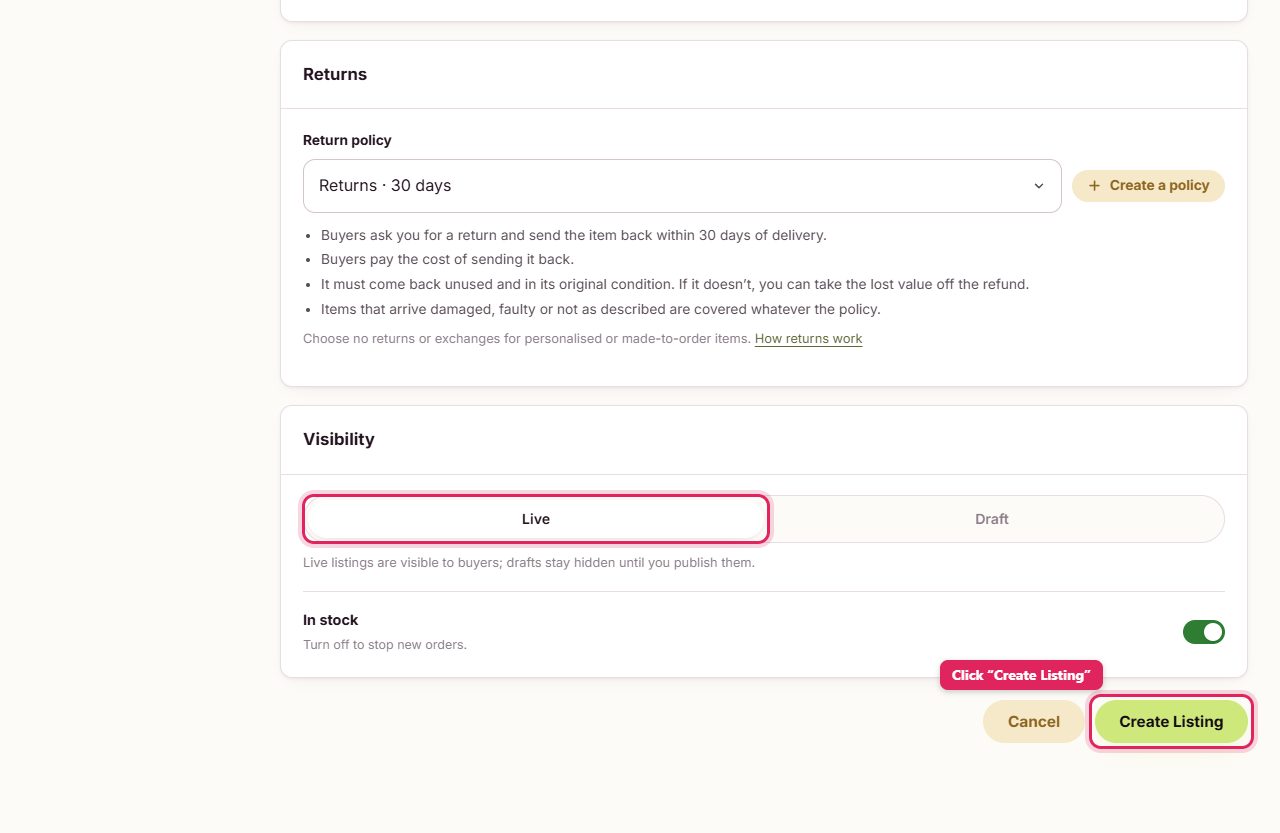
- Returns: pick a return policy.
At the bottom, leave Live selected so buyers can see your item (choose Draft to save it and finish later). Then click Create Listing.
7. Add a shop banner
A banner is the wide photo shown behind your shop name on your shop page. It makes your shop look finished and trustworthy.
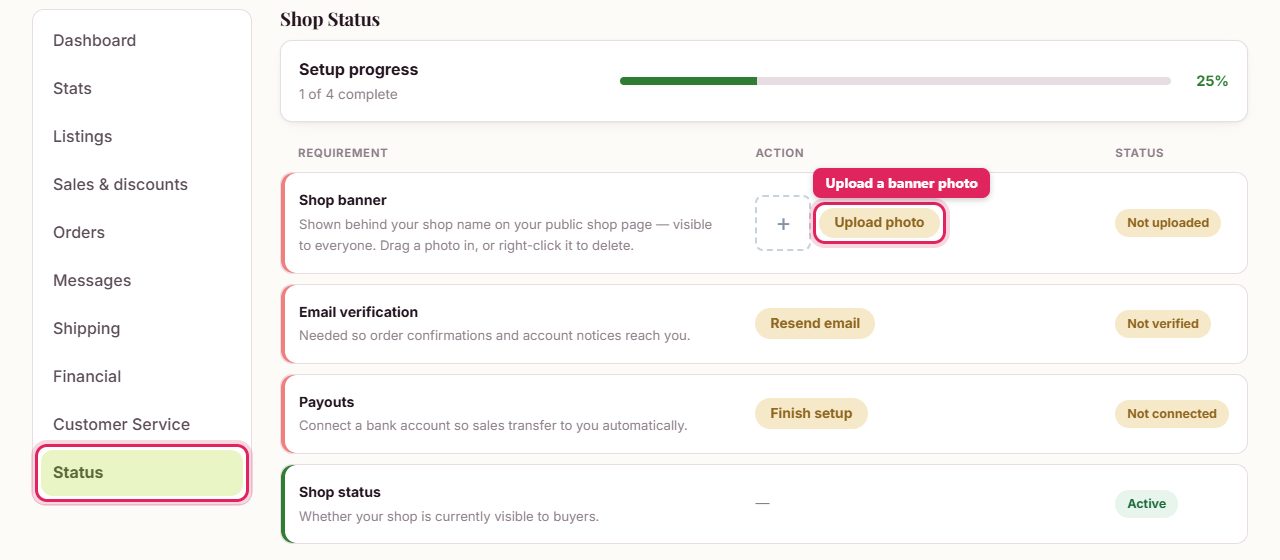
- Click Status in the menu.
- Next to Shop banner, click Upload photo and pick a wide photo. You can also drag a photo onto the box.
To add a profile picture or logo, click the small pencil on the round picture next to your shop name on the dashboard.
8. You’re open!
Once your listings are live, buyers can find them. Click View shop on your dashboard to see your shop the way buyers do, and share the link with friends and followers.
When someone buys, we email you and the order shows under Orders. From there you can buy a shipping label, ship the item and get paid.